HRStop allows administrators to upload multiple employee documents in one go, saving time and effort. Follow the steps below to successfully upload documents in bulk:
-
Open the Bulk Document Upload Page
Navigate to the following URL (replace yourcompanynamewith your actual company subdomain): - https://yourcompanyname.HRStop.com/ControlPanel/Employees/BulkDocumentUpload.
Enter the URL in your browser’s address bar and press Enter.
Steps to Upload Bulk Documents:
- Bulk Upload Interface
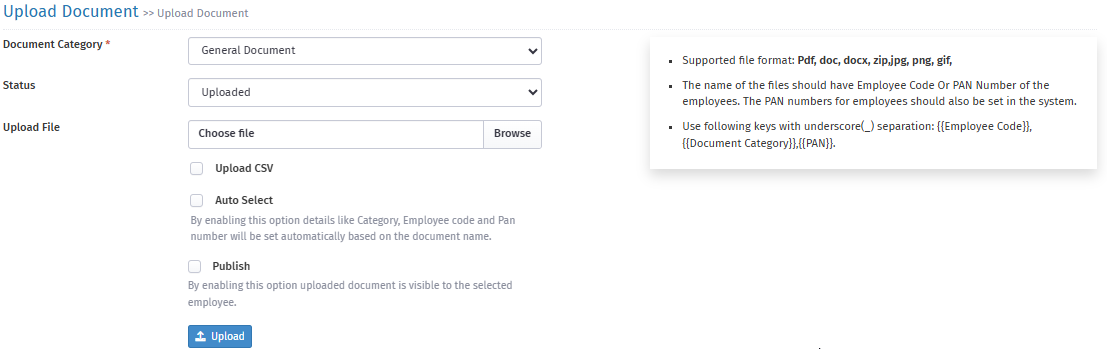
A page will open with the following options:
-
Document Category:
Select the appropriate category for the documents you're uploading (e.g., ID Proof, Offer Letter, NDA).
-
Status:
Set this to Uploaded.
-
Browse:
Click "Browse" and select the files you want to upload. Use Ctrl + A to select all documents at once.
-
Upload CSV (Optional):
Enable this option only if you're uploading a CSV file containing document metadata.
-
Auto Select:
When enabled, the system will auto-map uploaded files based on the document category name.
-
Publish:
Turn this on if you want employees to view their documents via the self-service portal.
-
Document Category:
-
Upload Documents
After configuring the settings, click on the Upload button to start the upload process.
Use Case & Tips:
-
The system will instantly display a log of all processed records, showing the status as Accepted or Rejected.
-
For rejected records, refer to the “Reason” column to understand the issue, correct the data/format, and retry the upload.
-
Always ensure your files and CSV (if used) match the format and naming conventions mentioned in the on-screen instructions.
-
Don't forget to replace the URL with your actual HRStop subdomain before accessing the upload page.